Thanks guys. Good to know I'm not the only one who likes it better that way. There's no way I would have tried building the lip from scratch, I'd end up having to find new quarters for sure.... Got started on the inner wheelwells today, got about 12" done on one side in about a half hour. At that rate I should be able to get working on the outer lips this weekend easily.
Got looking on youtube after I started on this- http://www.youtube.com/watch?v=4ksUcM76nrc Exactly what I'm doing. Good to know somebody considers it the 'proper' way to flare them out.
Here's another question- I've been throwing around the idea of splicing in a gas door/ filler neck from a newer car. I think it would look cleaner than the big chrome cap, plus a newer filler neck might make the tank easier to fill (no more holding the nozzle halfway out or getting gas all over the side of the car). I was thinking maybe even using one with a remote opener like on a Civic then no need for a locking gas cap. Any thoughts?
Phill
The Official H-Body Internet Community
Vega, Monza, Sunbird, Astre, Starfire, Skyhawk
76 Wagon Project
Moderator: Moderators
Re: 76 Wagon Project
![]() by 76wagon » Fri May 23, 2014 5:14 pm
by 76wagon » Fri May 23, 2014 5:14 pm
-
76wagon - Posts: 375
- Joined: Tue Mar 06, 2012 2:54 pm
- Location: Kitchener, Ontario
Re: 76 Wagon Project
![]() by NVEGAR8D » Fri May 23, 2014 6:47 pm
by NVEGAR8D » Fri May 23, 2014 6:47 pm
Hi Phill,
I'm also considering the same thing as i have to graft in a patch panel on that side too. i was thinking that a cavelier gas door has the closest shape i've seen so far and with some simple mods can be made to be a remote opening door.
nick75vega
I'm also considering the same thing as i have to graft in a patch panel on that side too. i was thinking that a cavelier gas door has the closest shape i've seen so far and with some simple mods can be made to be a remote opening door.
nick75vega
-

NVEGAR8D - Posts: 777
- Joined: Thu Oct 21, 2010 12:20 am
- Location: Orangeville/On, Canada
1975 Chevrolet Vega Hatchback
Re: 76 Wagon Project
![]() by zeke » Fri May 23, 2014 10:49 pm
by zeke » Fri May 23, 2014 10:49 pm
I like the plate in the hatch door. Also like the way your doing the flair by tilting the lip out. I have one of those princess auto power fist flanging tools, is nice for making lap joints. Then the weld sits flush with the surface and very little fill required. Keep up the good work Phill! 
Chris
zeke's 79 Monza Project
zeke's 78 Sport Coupe
Photographs posted by this user (zeke) are the sole property of this poster. Any use without express written permission is prohibited
zeke's 79 Monza Project
zeke's 78 Sport Coupe
Photographs posted by this user (zeke) are the sole property of this poster. Any use without express written permission is prohibited
-

zeke - Posts: 2930
- Joined: Fri Jul 21, 2006 3:27 am
- Location: Southern Ontario, Canada
1979 Chevrolet Monza 2+2
Re: 76 Wagon Project
![]() by 76wagon » Fri May 30, 2014 6:40 pm
by 76wagon » Fri May 30, 2014 6:40 pm
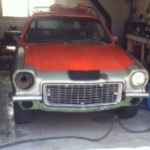
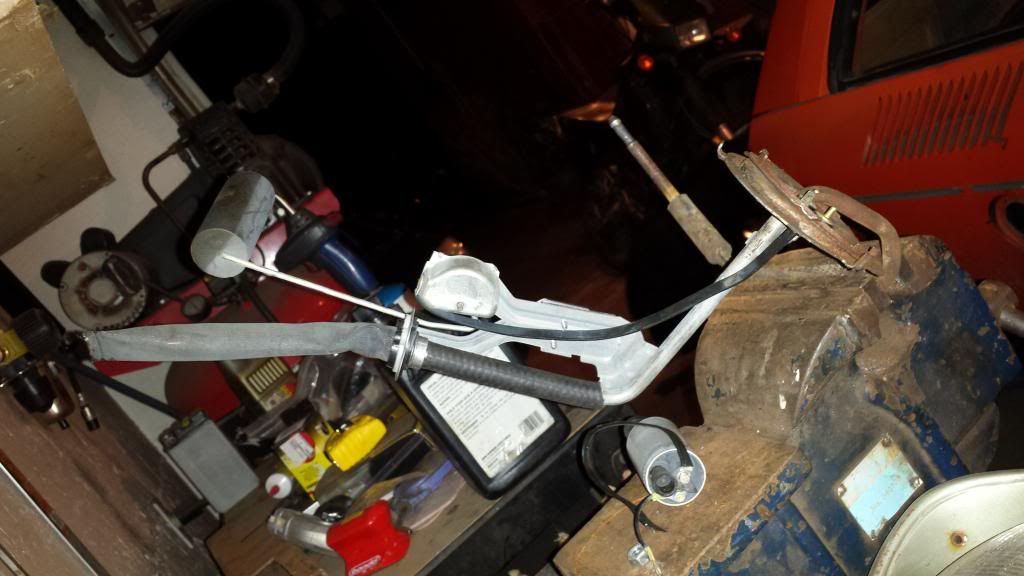
Another update- Got the sending unit ready for my mechanical fuel pump
While I have the gas tank out I decided to get rid of the electric fuel pump that was still in there. Might have had something to do with the car starving for fuel after a while at wide open throttle.
Sending unit as it was--
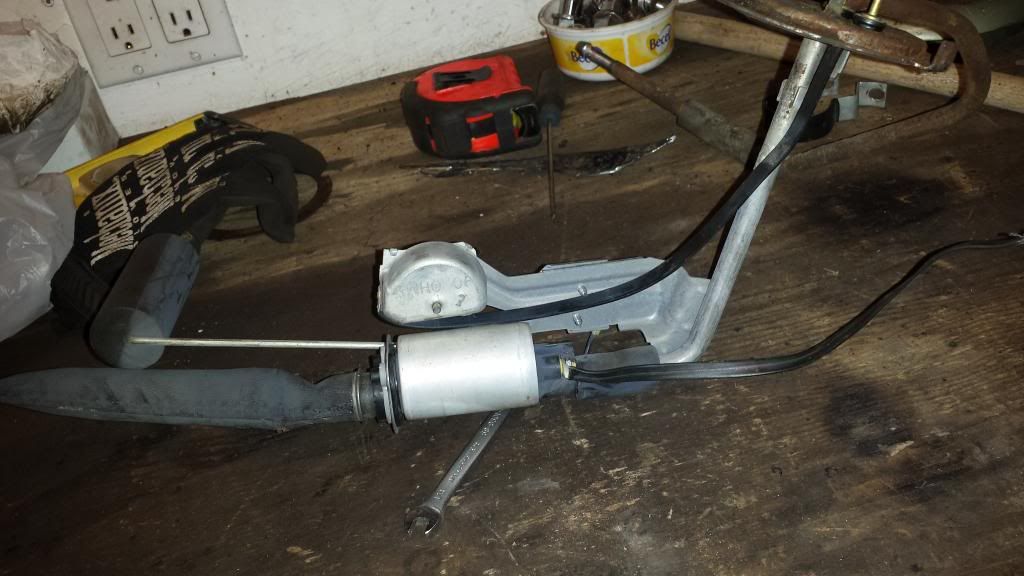
From the other side, you can see the steel pump support I ended up reusing
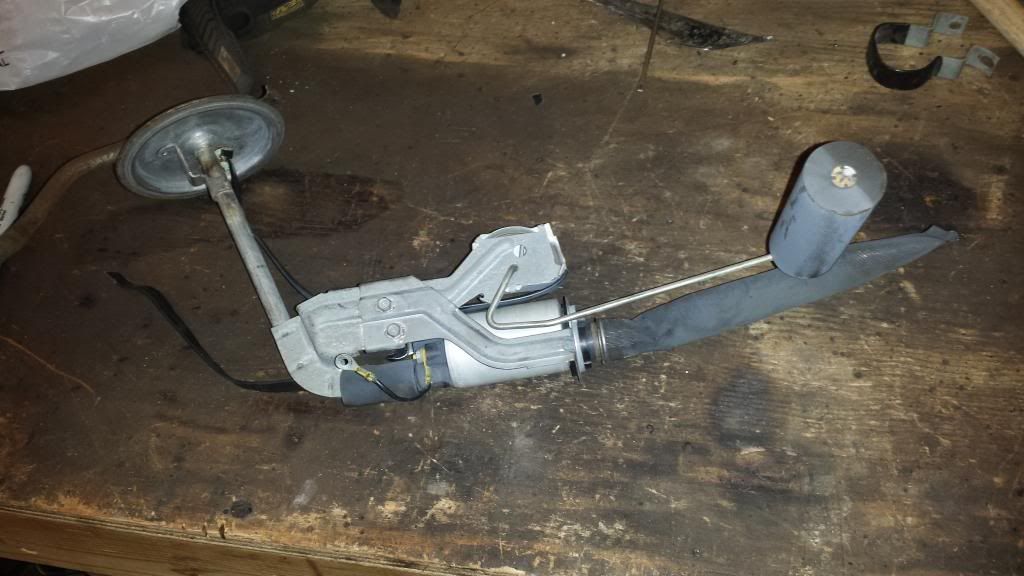
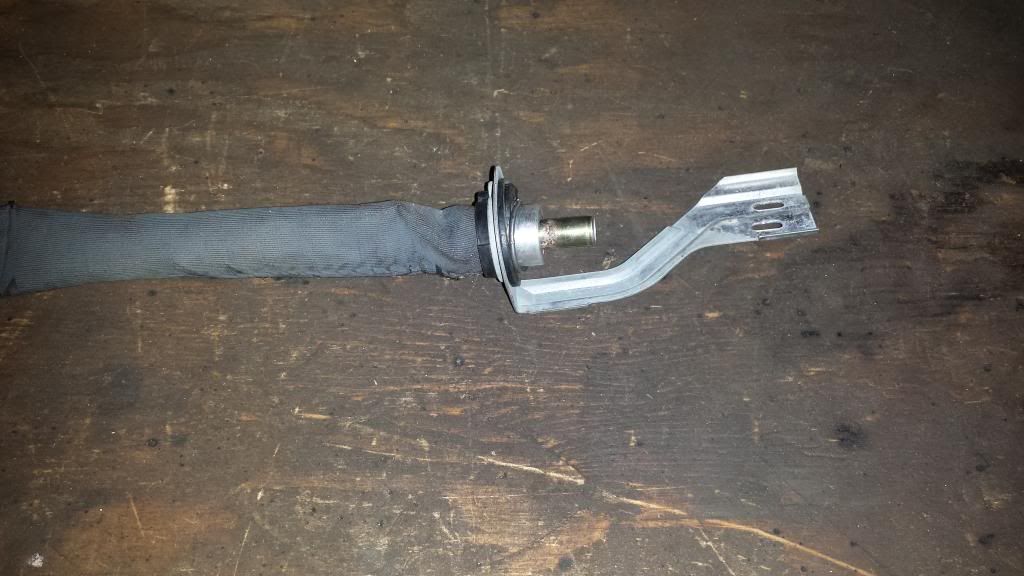
Now here's my easy solution- machined up a part to press fit a piece of 3/8 tubing into and press into the factory pickup screen. After it was all together I could put on the rubber bushing and steel support that were on the original pump
And here's everything together. Gonna add a couple stainless hose clamps before it goes back in the tank even though the hose can't really go anywhere
More to come- got some work done with the wheelwells but I'll put that in a seperate post
While I have the gas tank out I decided to get rid of the electric fuel pump that was still in there. Might have had something to do with the car starving for fuel after a while at wide open throttle.
Sending unit as it was--

From the other side, you can see the steel pump support I ended up reusing

Now here's my easy solution- machined up a part to press fit a piece of 3/8 tubing into and press into the factory pickup screen. After it was all together I could put on the rubber bushing and steel support that were on the original pump

And here's everything together. Gonna add a couple stainless hose clamps before it goes back in the tank even though the hose can't really go anywhere

More to come- got some work done with the wheelwells but I'll put that in a seperate post
-
76wagon - Posts: 375
- Joined: Tue Mar 06, 2012 2:54 pm
- Location: Kitchener, Ontario
Re: 76 Wagon Project
![]() by 76wagon » Fri May 30, 2014 7:05 pm
by 76wagon » Fri May 30, 2014 7:05 pm
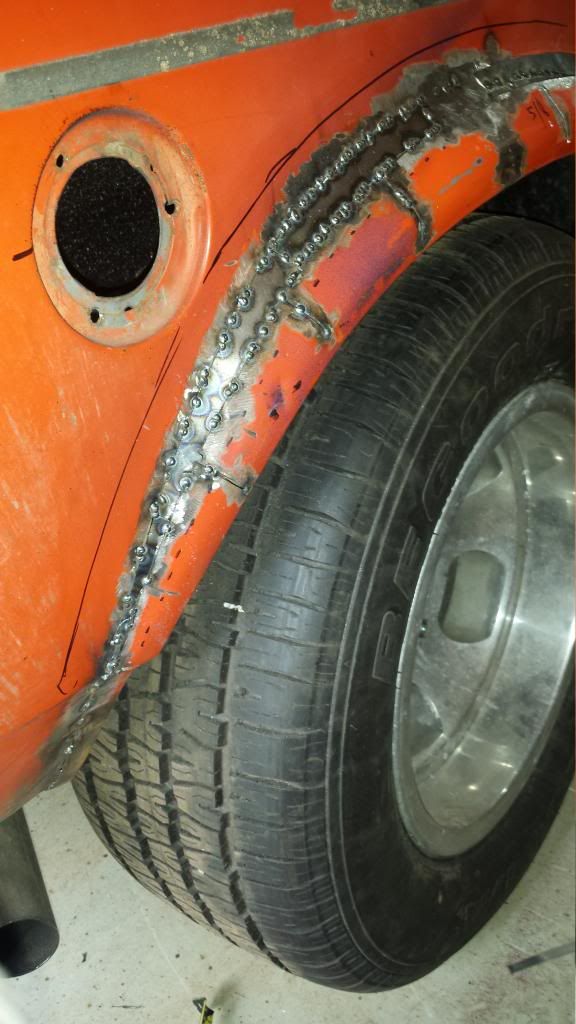
Now for the wheelwells-
Got some more welder time last weekend, burns are almost healed up now The inner wheelwells are all finished up except for some grinding and seam sealer. Really wish I would have done that on the rotisserie, it SUCKED!
  At least I could do a decent amount from the outside, I would have gone completely insane if I had to do it all from inside the wheelwells
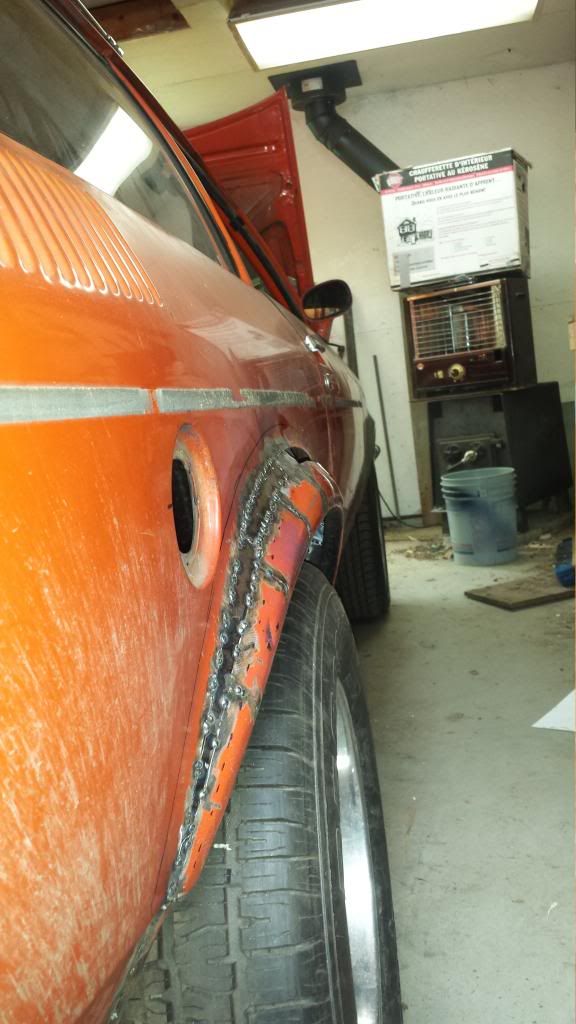
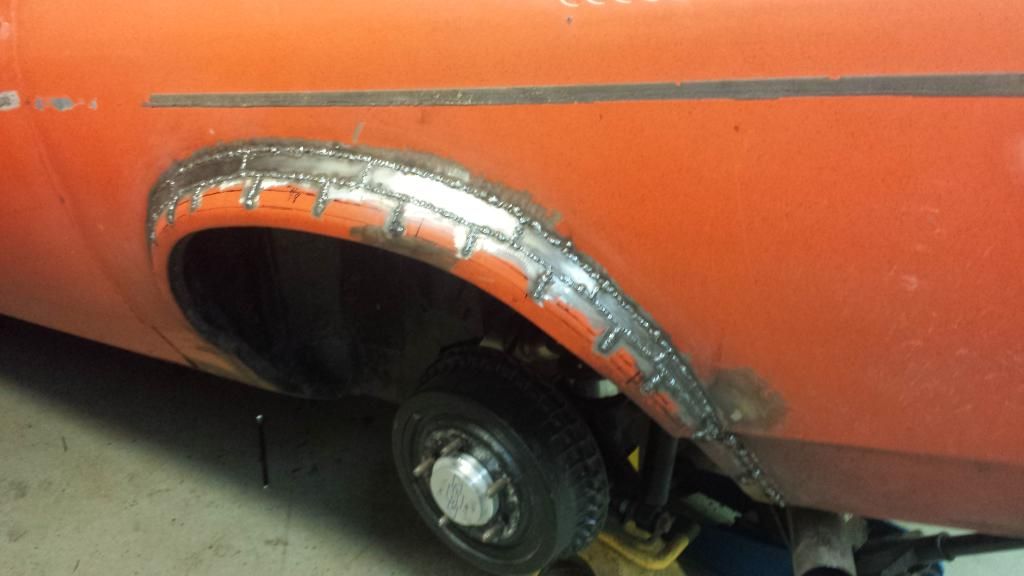
Got the right side tacked up half way around. It's looking better than I was expecting but still gonna need a little bondo to be perfect. Hard to tell from pictures but the contour from the quarter panel to the lip is actually coming out reallly nice. Should be hard to tell it's flared unless you have a Vega or it's parked next to another one
I'm starting on days Monday and hoping to have the metal work done on both wheelwells by next Friday. Then I can get the tank back in and the car can be mobile again. Then it's on to getting the headlights and marker lights in properly so I can drive the thing once in a while
Also made up a cardboard template of the contour of the quarter panel to check against other cars for a gas cap door and filler neck transplant. So far best match is my S10 but it's way too big. Gonna bring it with me next trip to the wrecker's and check everything till I find something that will work.
Phill
Got some more welder time last weekend, burns are almost healed up now
At least I could do a decent amount from the outside, I would have gone completely insane if I had to do it all from inside the wheelwellsGot the right side tacked up half way around. It's looking better than I was expecting but still gonna need a little bondo to be perfect. Hard to tell from pictures but the contour from the quarter panel to the lip is actually coming out reallly nice. Should be hard to tell it's flared unless you have a Vega or it's parked next to another one


I'm starting on days Monday and hoping to have the metal work done on both wheelwells by next Friday. Then I can get the tank back in and the car can be mobile again. Then it's on to getting the headlights and marker lights in properly so I can drive the thing once in a while
Also made up a cardboard template of the contour of the quarter panel to check against other cars for a gas cap door and filler neck transplant. So far best match is my S10 but it's way too big. Gonna bring it with me next trip to the wrecker's and check everything till I find something that will work.
Phill
-
76wagon - Posts: 375
- Joined: Tue Mar 06, 2012 2:54 pm
- Location: Kitchener, Ontario
Re: 76 Wagon Project
![]() by NVEGAR8D » Fri May 30, 2014 11:01 pm
by NVEGAR8D » Fri May 30, 2014 11:01 pm
Hi Phill,
Looking real good. Just in case if you are going to cut the filler hole from your fender, i might need it . I'm repairing my rear quarter with a 71-3 patch panel and need to cut a hole for the filler in it. Still undesided as to what i may do. Please think of me when you're done
nick75vega
Looking real good. Just in case if you are going to cut the filler hole from your fender, i might need it . I'm repairing my rear quarter with a 71-3 patch panel and need to cut a hole for the filler in it. Still undesided as to what i may do. Please think of me when you're done
nick75vega
-
NVEGAR8D - Posts: 777
- Joined: Thu Oct 21, 2010 12:20 am
- Location: Orangeville/On, Canada
1975 Chevrolet Vega Hatchback
Re: 76 Wagon Project
![]() by 76wagon » Fri Aug 29, 2014 12:54 pm
by 76wagon » Fri Aug 29, 2014 12:54 pm
Finally I got back at the Vega after a pretty busy summer. Think I've decided against changing the gas cap for now (sorry Nick) but I got the passenger side quarter all welded up with a skim coat of short strand fiberglass just in case there are any pinholes I didn't notice. Seems I don't have any pictures of that yet, I'll get some up soon. With that done I won't have any grinding or welding next to the gas cap so I was able to get the gas tank back in and the car back on the ground and mobile again.
I got the headlight buckets and mounting plates (?) sandblasted and painted up. When I get home after the long weekend I can get them installed finally.
Last night's little project was the signal lights. On the ones I have the sockets were in pretty bad shape, plus I didn't have the proper plugs to wire them to the car so I had to get a bit creative. I ended up ripping the sockets out and welding in Ford sockets.
Here's the signal light blasted and drilled out with the new socket next to it.
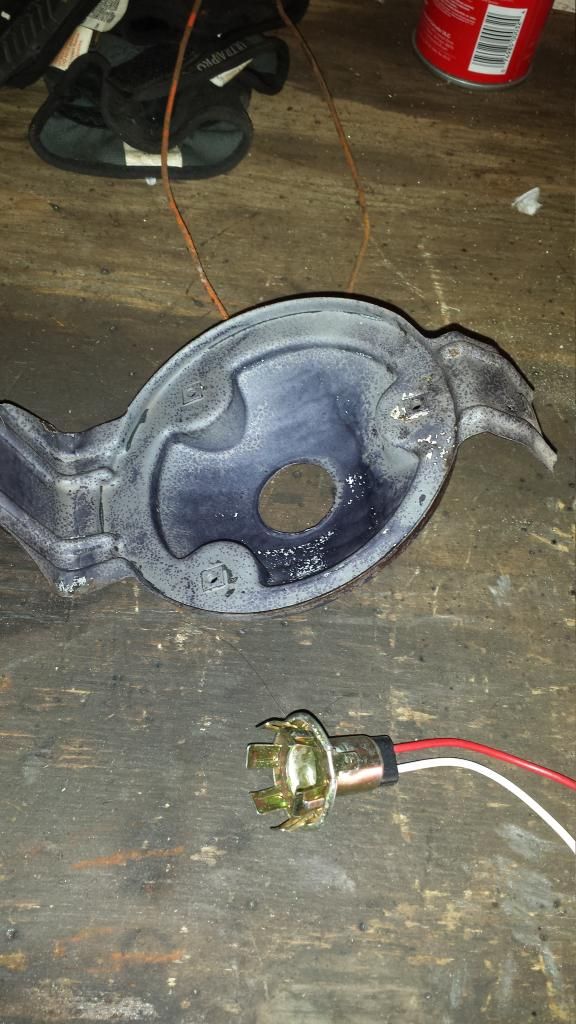
Socket popped in, looks good but a bit loose and not waterproof at all
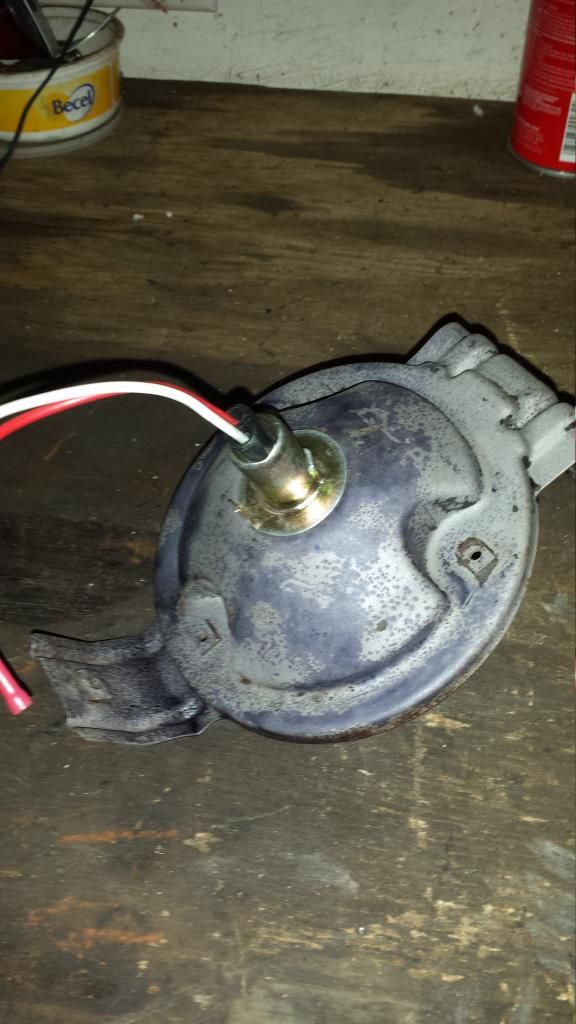
All welded up, both problems solved!
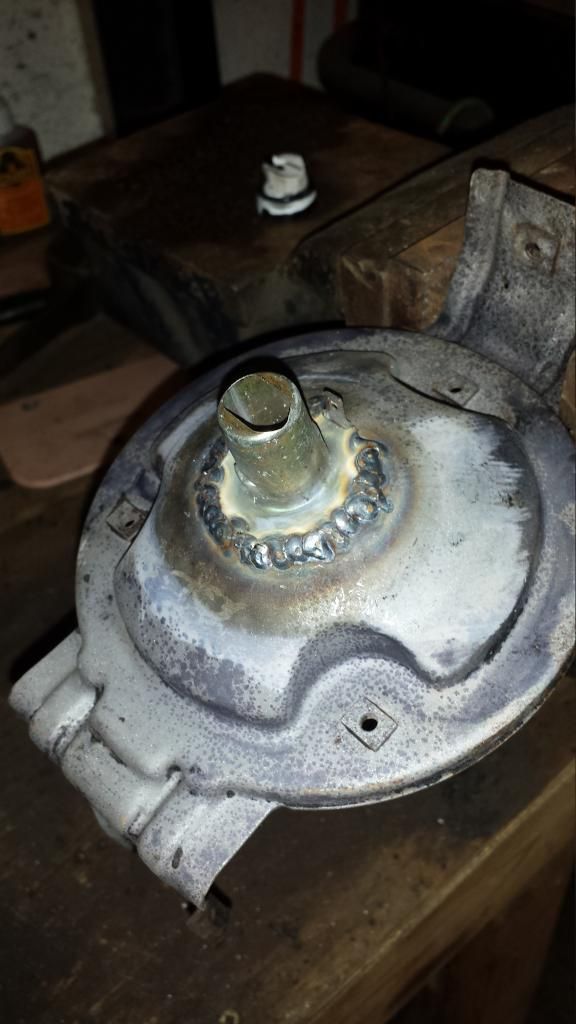
Got the insides painted white last night, gonna paint the rest black tonight then hopefully have signal lights to go with my headlights next week. Next step- finish the driver's side wheelwell and I can actually drive it a few miles this year finally.
Phill
-
76wagon - Posts: 375
- Joined: Tue Mar 06, 2012 2:54 pm
- Location: Kitchener, Ontario
Re: 76 Wagon Project
![]() by Lunatic » Sun Aug 31, 2014 8:13 am
by Lunatic » Sun Aug 31, 2014 8:13 am
Hey Phill.
I'm liking the progress on your wagon! I'd like to check this out in person sometime. Especially since you're so close to me. I too have a motorcycle. We should go out for a ride before it gets too cold. It's almost September you know. Keep up the good work.
I'm liking the progress on your wagon! I'd like to check this out in person sometime. Especially since you're so close to me. I too have a motorcycle. We should go out for a ride before it gets too cold. It's almost September you know. Keep up the good work.
- Lunatic
- Posts: 76
- Joined: Sun Aug 10, 2014 8:24 am
- Location: Kitchener, Ontario, Canada
Re: 76 Wagon Project
![]() by 76wagon » Thu Sep 18, 2014 8:39 pm
by 76wagon » Thu Sep 18, 2014 8:39 pm
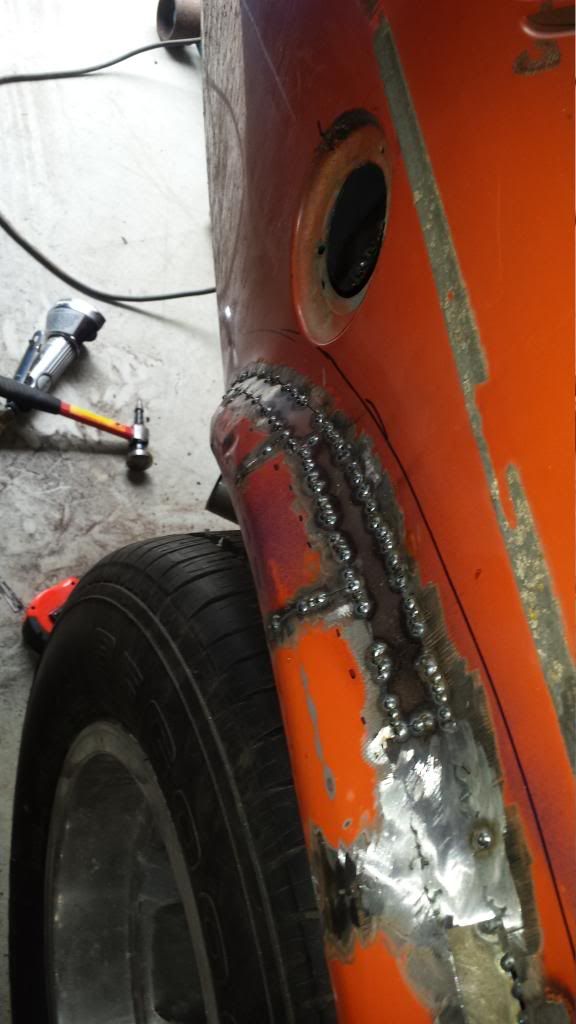
Got a bit more done on the car over the last week. Took a lot of patience (and beers) but I got the drivers side rear wheelwell welded up, ground down and a skim coat of fiberglass over it just in case there were any pinholes where I welded.
All welded up, finally
Skim coat of fiberglass...

Then I got the welds on the inner wheelwells all sealed up with seam sealer and a couple coats of black rust paint over it, tires back on, car back on the ground, TEST DRIVE TIME!!
Took it out today for a little drive- first off the brakes feel like they need bleeding again, hopefully that fixes it. Alignment needs done again- no big deal, I modified one of my upper control arms to fix the placement of the wheel so I knew that already.
On my way back home I'm stopped at a light and get a whiff of coolant, there's a bit of steam coming out from under the hood OH BOY. Got it home, turns out the upper rad hose is leaking. Not a huge problem either because I have a brand new one in the garage but it's enough to get me motivated....
Next step will be either moving or slanting the rad forward to gain some clearance between the water pump and rad, also between the alternator and upper rad hose (why the hose leaked in the first place).I'll be using an inline filler neck and sealing up the cap hole on the rad so I can move at least the top half of the rad in front of the rad support. Hopefully I can get at this next week and still be able to get a couple hundred km on it before it snows
Inline filler neck- http://www.summitracing.com/int/parts/s ... /overview/
Back to work again I guess
Phill
All welded up, finally

Skim coat of fiberglass...

Then I got the welds on the inner wheelwells all sealed up with seam sealer and a couple coats of black rust paint over it, tires back on, car back on the ground, TEST DRIVE TIME!!
Took it out today for a little drive- first off the brakes feel like they need bleeding again, hopefully that fixes it. Alignment needs done again- no big deal, I modified one of my upper control arms to fix the placement of the wheel so I knew that already.
On my way back home I'm stopped at a light and get a whiff of coolant, there's a bit of steam coming out from under the hood OH BOY. Got it home, turns out the upper rad hose is leaking. Not a huge problem either because I have a brand new one in the garage but it's enough to get me motivated....
Next step will be either moving or slanting the rad forward to gain some clearance between the water pump and rad, also between the alternator and upper rad hose (why the hose leaked in the first place).I'll be using an inline filler neck and sealing up the cap hole on the rad so I can move at least the top half of the rad in front of the rad support. Hopefully I can get at this next week and still be able to get a couple hundred km on it before it snows
Inline filler neck- http://www.summitracing.com/int/parts/s ... /overview/
Back to work again I guess
Phill
-
76wagon - Posts: 375
- Joined: Tue Mar 06, 2012 2:54 pm
- Location: Kitchener, Ontario
Re: 76 Wagon Project
![]() by waybad » Fri Sep 19, 2014 6:13 pm
by waybad » Fri Sep 19, 2014 6:13 pm
more pictures and video!! this alteration is bad a$$!
well done
Tinker
well done
Tinker
Tinker
-

waybad - Posts: 1794
- Joined: Sun Feb 24, 2008 12:03 am
Re: 76 Wagon Project
![]() by zzip » Sat Sep 20, 2014 4:54 pm
by zzip » Sat Sep 20, 2014 4:54 pm
Wow Phill,
great welding job . (Thats another thing i need to learn) .
Like the pictures and the explanation .
Peter from Antwerp
great welding job . (Thats another thing i need to learn) .
Like the pictures and the explanation .
Peter from Antwerp
1988 Monza L4 2.5L
1989 Monza Spyder L4 2.5L
1990 Monza Spyder V6 3.2L
1991 Monza Spyder V6 3.8L
2013 Monza V6 3.8L
2014 Starfire V6 3.8L
1989 Monza Spyder L4 2.5L
1990 Monza Spyder V6 3.2L
1991 Monza Spyder V6 3.8L
2013 Monza V6 3.8L
2014 Starfire V6 3.8L
-

zzip - Posts: 306
- Joined: Thu Oct 24, 2013 11:52 am
- Location: Belgium
1980 Chevrolet Monza 2+2
Re: 76 Wagon Project
![]() by 76wagon » Wed Sep 24, 2014 7:11 pm
by 76wagon » Wed Sep 24, 2014 7:11 pm
Thanks for the comments guys. Helps keep the motivation up!
Got the rad out today, It's still working well with no leaks but has a bit of damage in different places and doesn't look its best. Now I'm thinking since I'm going to be modifying the rad anyway might as well go with an aluminum rad. I'm leaning towards this one- http://www.summitracing.com/int/parts/g ... /overview/ very close to the size of the Monza rad I have now and the price is definitely right. Plan is to mount it with at least the top ahead of the rad support. Gonna get the rad cap welded shut and use one of these things instead http://www.summitracing.com/int/parts/s ... /overview/ . Hopefully I can get it next week some time and get the car back on the road for the long weekend.
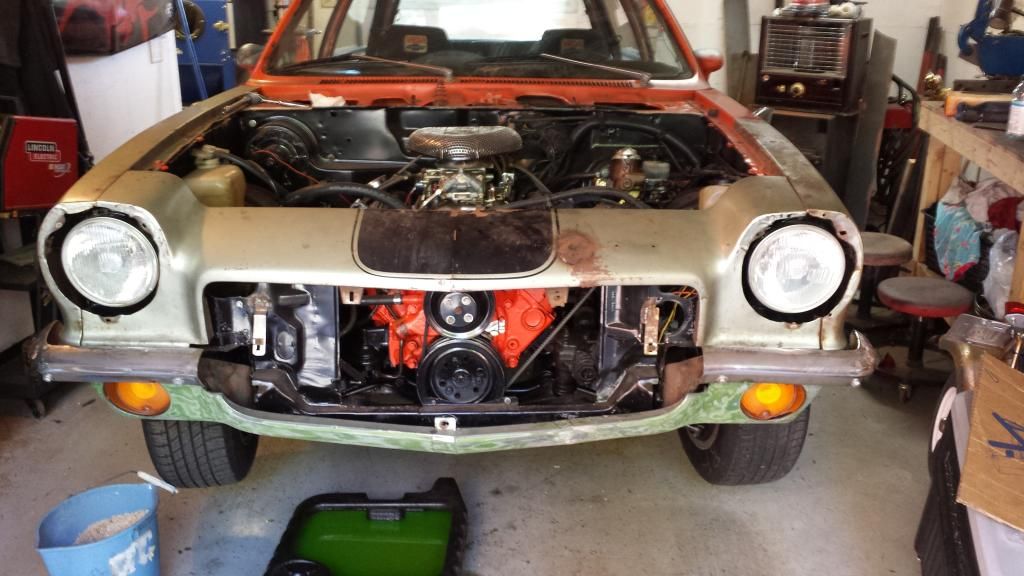
Gotta have at least one pic- here is how it sits right now.
Phill
Got the rad out today, It's still working well with no leaks but has a bit of damage in different places and doesn't look its best. Now I'm thinking since I'm going to be modifying the rad anyway might as well go with an aluminum rad. I'm leaning towards this one- http://www.summitracing.com/int/parts/g ... /overview/ very close to the size of the Monza rad I have now and the price is definitely right. Plan is to mount it with at least the top ahead of the rad support. Gonna get the rad cap welded shut and use one of these things instead http://www.summitracing.com/int/parts/s ... /overview/ . Hopefully I can get it next week some time and get the car back on the road for the long weekend.
Gotta have at least one pic- here is how it sits right now.

Phill
-
76wagon - Posts: 375
- Joined: Tue Mar 06, 2012 2:54 pm
- Location: Kitchener, Ontario
Re: 76 Wagon Project
![]() by 76wagon » Tue Sep 30, 2014 5:52 pm
by 76wagon » Tue Sep 30, 2014 5:52 pm
Parts showed up today! Got my new rad and inline rad cap adapter, ready to get this thing back together. But wait...
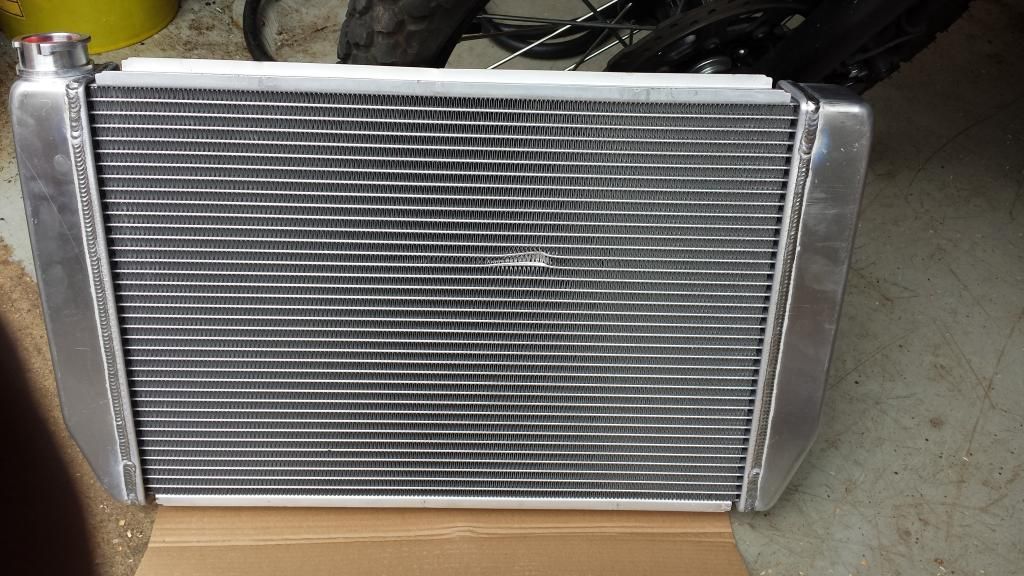
Something must have fallen on it in the truck, box was damaged as well. Did a live chat with customer service and they offered me a refund and a $50 gift card to keep it or to send a new one. I wanted a new one and it's already on its way, gotta love Summit.
Got a few other things done too. My water pump was out by about 3/16"- pressed the flange on further, problem solved. Also got to the wreckers and picked up an electric fan. Couldn't find a Taurus but an Escort ZX2 fan looks like it'll fit nicely.
So now to get the mounting figured out, at least I can measure off the damaged one to get the mounts made up. Hopefully I can have it out driving by next weekend.
Phill
-
76wagon - Posts: 375
- Joined: Tue Mar 06, 2012 2:54 pm
- Location: Kitchener, Ontario
Re: 76 Wagon Project
![]() by 76wagon » Thu Oct 09, 2014 3:03 pm
by 76wagon » Thu Oct 09, 2014 3:03 pm
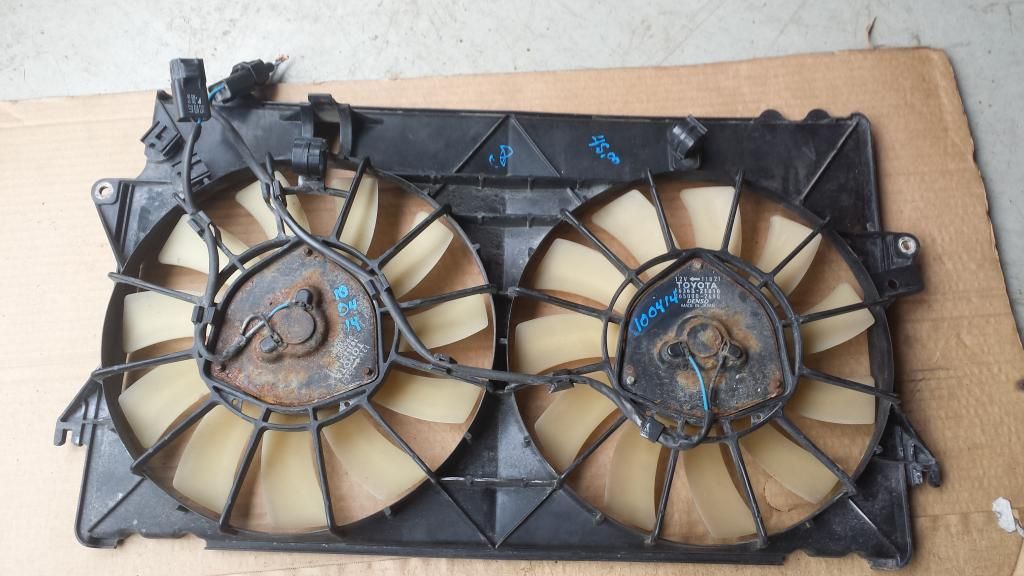
New rad showed up damage free Friday so got a bit more done on the car over the weekend. Got the lower rad support chopped out and rebuilt, gives me about 1/4" clearance to the lower front valance and enough clearance at the top to fit the rad nicely. Saturday I got out to the scrapyard and picked up a bunch of different rad mounts from various cars, decided on using Cavalier mounts at the bottom and Civic mounts up top. Lowers are installed, still have to get the uppers installed but should probably get the rad all welded up first (won't fit where I want it with the filler neck still there). Also while I was there I found an even better fan- out of a Prius of all things. It's a dual fan with a shroud, measures about 14-1/4" x 24" x about 2-1/2" thick. Gives me enough clearance to the water pump and just enough out front to fit a small A/C condensor.
Here's the mounts I'm using- Cavaliers on the bottom and Civic up top
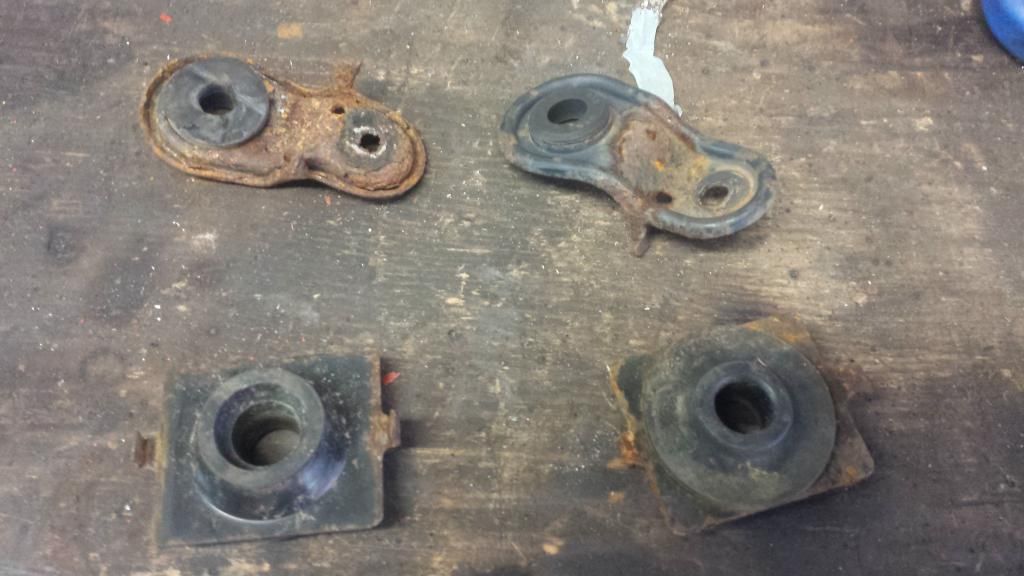
Lower mounts all welded in. Really nice having a sandblast cabinet for stuff like this
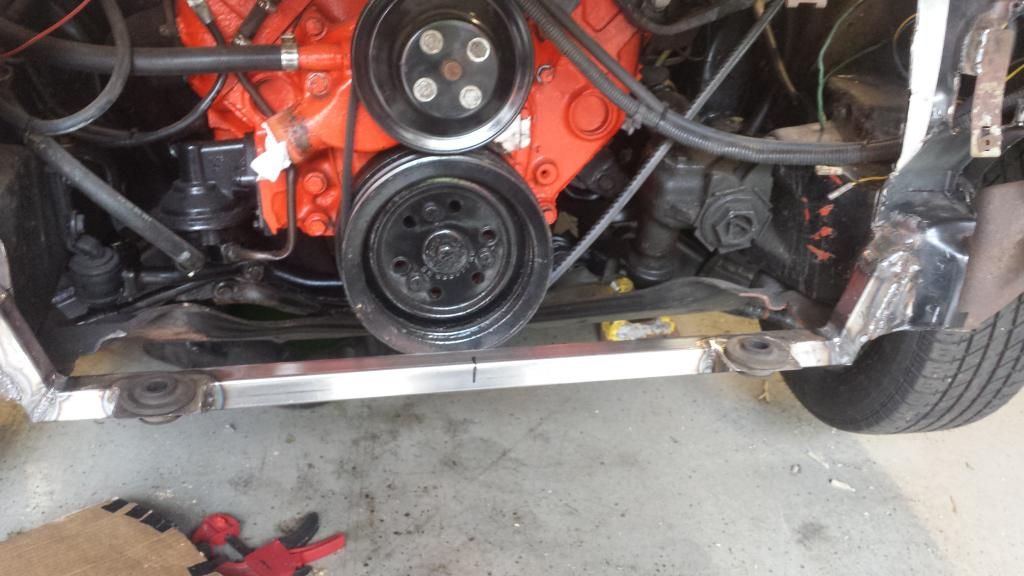
Here's that Prius fan- should fit just about perfect with enough clearance to the water pump and enough room in front of the rad for a small AC condenser.
The goal for the week is to get the welding done on the rad but that depends on if the guy welding it has the time for it. Hopefully I can have the rad installed and the car back on the road by the end of the weekend. Having family up to the cottage next weekend and I want to drive the Vega up, at least I want to get a couple hundred miles on it before the snow flies- that way I can work out any more bugs that might come up and get on the bodywork over the winter.
Phill
Here's the mounts I'm using- Cavaliers on the bottom and Civic up top

Lower mounts all welded in. Really nice having a sandblast cabinet for stuff like this

Here's that Prius fan- should fit just about perfect with enough clearance to the water pump and enough room in front of the rad for a small AC condenser.

The goal for the week is to get the welding done on the rad but that depends on if the guy welding it has the time for it. Hopefully I can have the rad installed and the car back on the road by the end of the weekend. Having family up to the cottage next weekend and I want to drive the Vega up, at least I want to get a couple hundred miles on it before the snow flies- that way I can work out any more bugs that might come up and get on the bodywork over the winter.
Phill
Last edited by 76wagon on Sat Dec 17, 2016 3:36 pm, edited 1 time in total.
-
76wagon - Posts: 375
- Joined: Tue Mar 06, 2012 2:54 pm
- Location: Kitchener, Ontario
Re: 76 Wagon Project
![]() by 76wagon » Thu Oct 09, 2014 3:28 pm
by 76wagon » Thu Oct 09, 2014 3:28 pm
Got the fan shroud all trimmed up last night and it's a perfect fit!
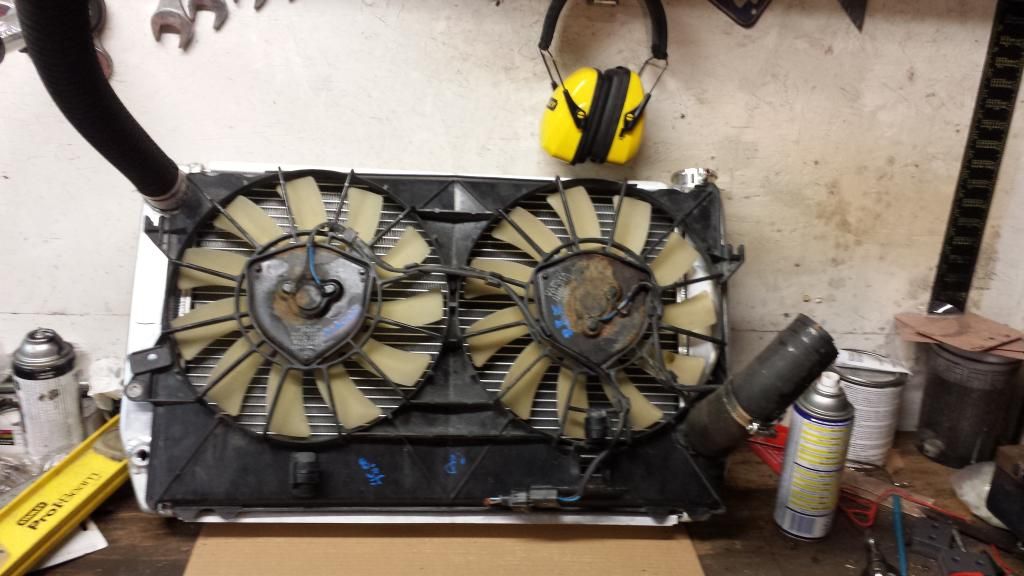
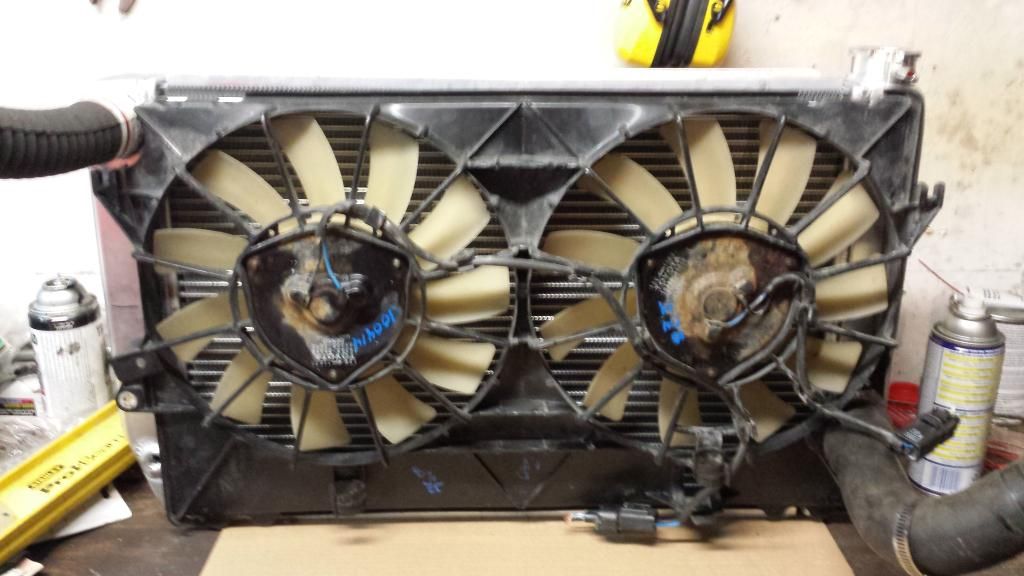
I didn't get any with the old mounts trimmed off but I'll get a couple tonight. I also designed up some pretty slick fan mounts that I'll get some pics of once they're bent up.
Phill


I didn't get any with the old mounts trimmed off but I'll get a couple tonight. I also designed up some pretty slick fan mounts that I'll get some pics of once they're bent up.
Phill
-
76wagon - Posts: 375
- Joined: Tue Mar 06, 2012 2:54 pm
- Location: Kitchener, Ontario
Who is online
Users browsing this forum: No registered users and 6 guests