What happened to the rear swaybar? Looks like the same one I have. PIA to install, I wasn't 100% sure which way it was supposed to go on since it didn't really fit perfect either way.
Mark
The Official H-Body Internet Community
Vega, Monza, Sunbird, Astre, Starfire, Skyhawk
'72 Vega wagon, the hard way
Moderator: Moderators
45 posts
• Page 2 of 3 • 1, 2, 3
Re: '72 Vega wagon, the hard way
![]() by gotmud7 » Thu Apr 16, 2015 11:41 am
by gotmud7 » Thu Apr 16, 2015 11:41 am
The only Vega's that only had a little rust were the ones still on the assembly line.
-

gotmud7 - Posts: 795
- Joined: Thu Jul 12, 2007 3:38 pm
- Location: Manhattan, IL
1972 Chevrolet Vega GT
Re: '72 Vega wagon, the hard way
![]() by monzaaddict » Thu Apr 16, 2015 4:21 pm
by monzaaddict » Thu Apr 16, 2015 4:21 pm
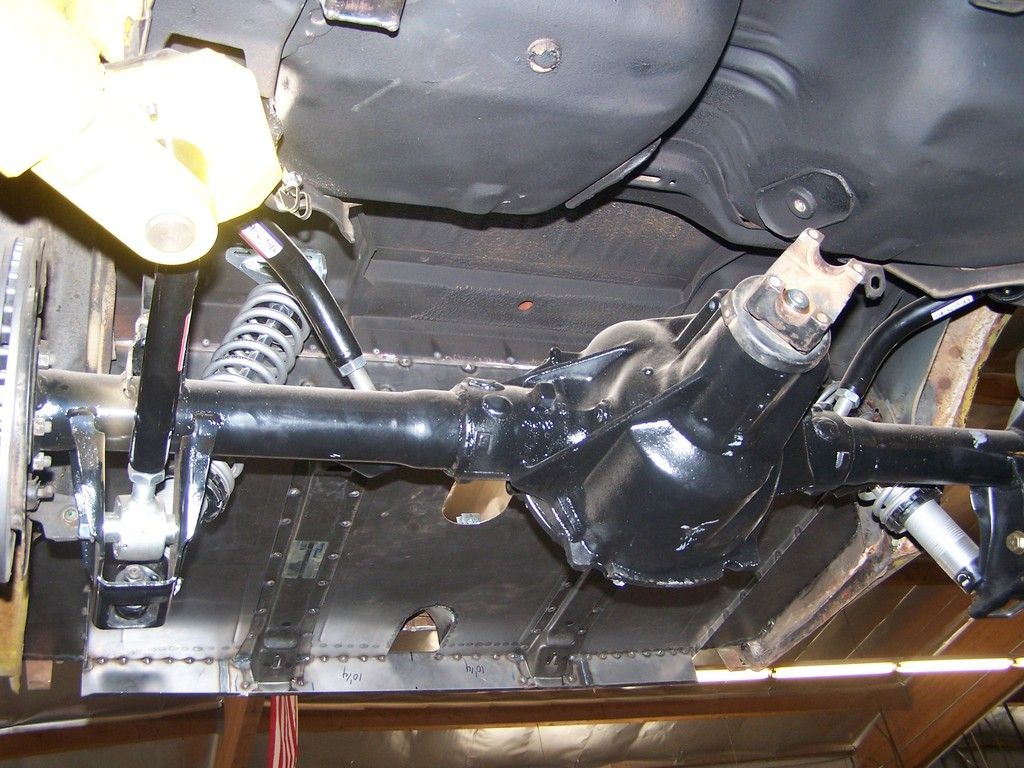
What is the width of the housing?
It looks close to stock as the space between the housing flange and the shock/lower control arm bracket is about what would be on a stock width rear.
It sounds like you used a 4wd rear disc rear. I am not sure if the actual housing is wider than the 2wd version but he disc certainly is and the actual axles are longer to accommodate the disc. The the caliper is also positioned up higher and the bearing is wider.
I believe you can use just the backing plate from a 2wd blazer to reposition your calipers. everything else should bolt on from the 4wd brakes. to me this would seem to be the simplest solution if it gives you the clearance you need.
http://www.pro-touring.com/threads/9730 ... conversion
I know there are spring perch adapters that allow a coil over spring to be used in place of a wider spring. I would look in to that before using coil overs and transferring the vehicle weight to the shock mounts.
viewtopic.php?f=20&t=37550&start=30
Would swapping the caliper brackets side to side help with clearance ( placing the caliper toward front of axle instead of towards back.
4wd drums would likely work too but I don't think you want to hear that
I looked at your photobucket account and it looks like you could pull the tires in further. You could get the 2wd rear discs which position the calipers differently behind or in front of the axle and are shorter. I believe you would have to shorten your axles and change to the narrower axle bearings ( I might be wrong about this).
http://dave.h-body.org/Build%20a%20Bett ... %20End.htm
- monzaaddict
- Posts: 2599
- Joined: Sun Jul 02, 2006 3:04 pm
Re: '72 Vega wagon, the hard way
![]() by b_pappy » Fri Apr 17, 2015 4:09 pm
by b_pappy » Fri Apr 17, 2015 4:09 pm
Correct, the rear came out of a S-10 ZR2, which is 2" wider (per side) than stock, and uses the larger bearings like you said. We took 3.75" off each side, but I forget what total width wound up at. It's written down in our notes. I'm real happy with the rear end shop did, it just fit in perfect.
Anyhow, I had a few choices with the brakes, including going with Wilwood calipers instead. We flipped and turned, and rotated, this fits best. The rear end is pretty well centered, with just over 1/2" clearance going onboard, so no narrower.
We're going ahead with the coilovers, and we will fab some extra support structure in the shock mount area.
The rear bar was an Addco. I didn't care for the way it mounted either, and you're right, it was hard to tell what was correct. Right now it's back in the box. I may just run a stock rear bar instead.
No hurry on this, I just want it right, or at least the way I think it should be done.
Bruce
- b_pappy
- Posts: 193
- Joined: Mon Nov 17, 2014 9:30 pm
Re: '72 Vega wagon, the hard way
![]() by monzaaddict » Sat Apr 18, 2015 1:52 pm
by monzaaddict » Sat Apr 18, 2015 1:52 pm
the only thing I don' t like about coil overs on the back is the shock mounts aren't designed to support weight - you said you are adding bracing. The angle bothers me. you are loading the lower brackets in the horizontal plane. It will probably work just not optimal. Another simple fix would be to get shorter 2wd rotors and then space the backing plate out about 9/10 of an inch to align the caliper ( more clearance for springs and between caliper and wheel well arch - relatively cheap too).
- monzaaddict
- Posts: 2599
- Joined: Sun Jul 02, 2006 3:04 pm
Re: '72 Vega wagon, the hard way
![]() by b_pappy » Mon May 18, 2015 11:07 pm
by b_pappy » Mon May 18, 2015 11:07 pm
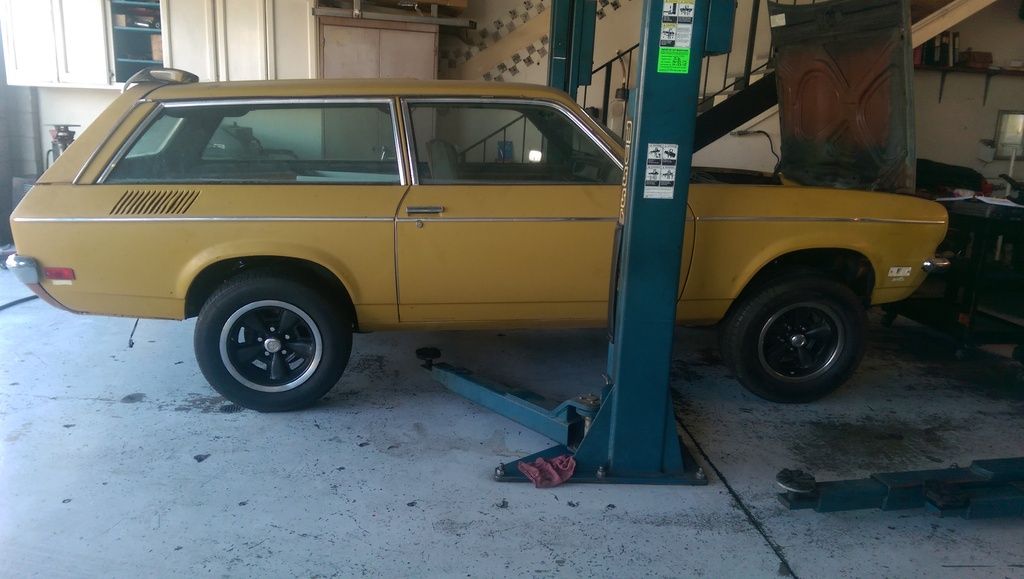
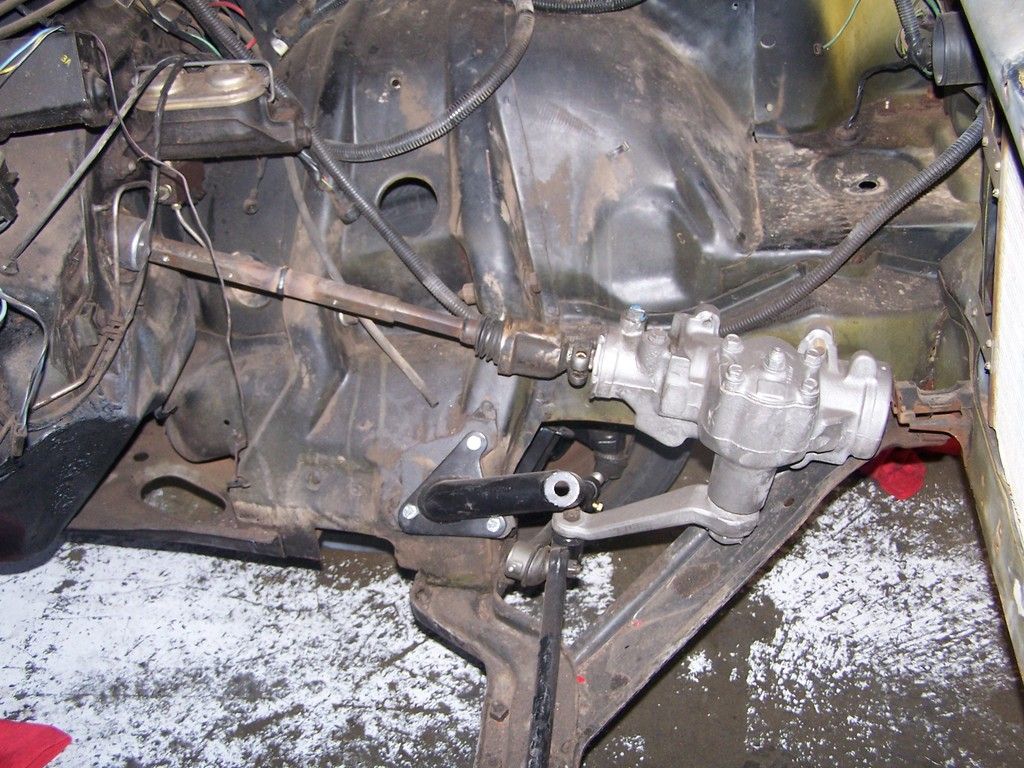
Making some progress, it has coilovers and disc brakes on all corners, and these are the wheels I'll restore and use. Still doing the power steering conversion (need the shaft is anyone has one), then we'll do the sub frame connectors, Camaro fuel tank, and custom traction bars.

- b_pappy
- Posts: 193
- Joined: Mon Nov 17, 2014 9:30 pm
Re: '72 Vega wagon, the hard way
![]() by b_pappy » Fri Jun 05, 2015 11:05 pm
by b_pappy » Fri Jun 05, 2015 11:05 pm
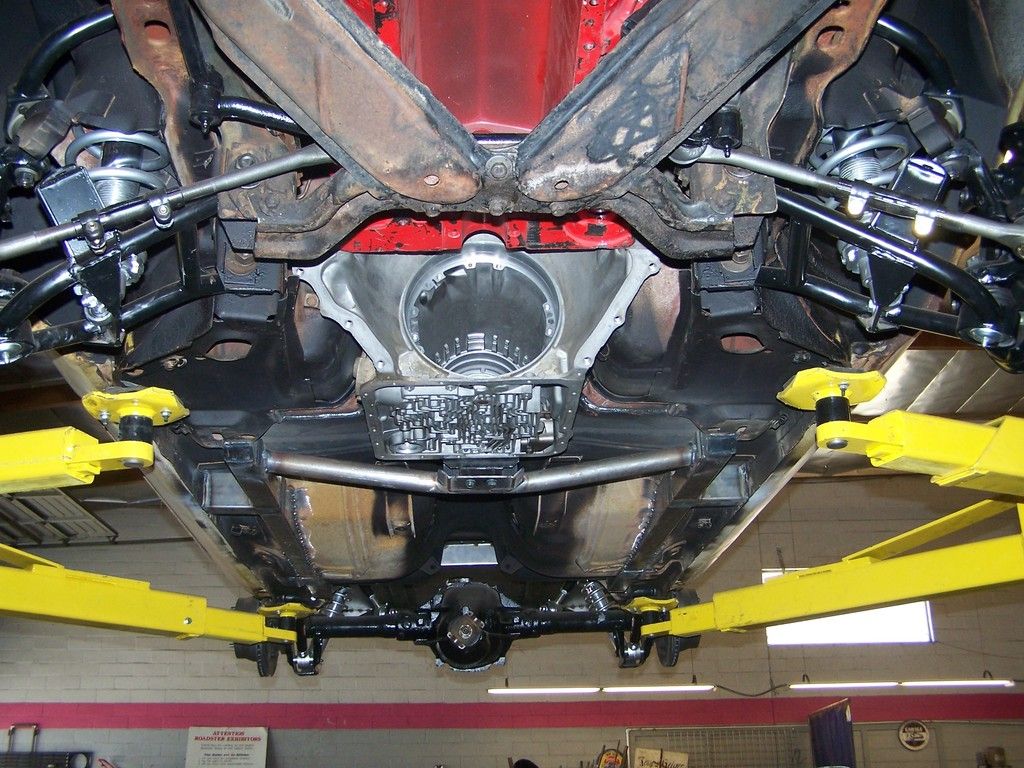
The car is really starting to take shape. It made it over to the fab shop. Right now it is sitting next to Axl Rose's '55 Chevy. Anyhow, these guys have great skills and are down to earth.
They are putting in the Chris Alston sub frame connectors, the first gen gas tank conversion, and reworking the engine and trans mounts to work.
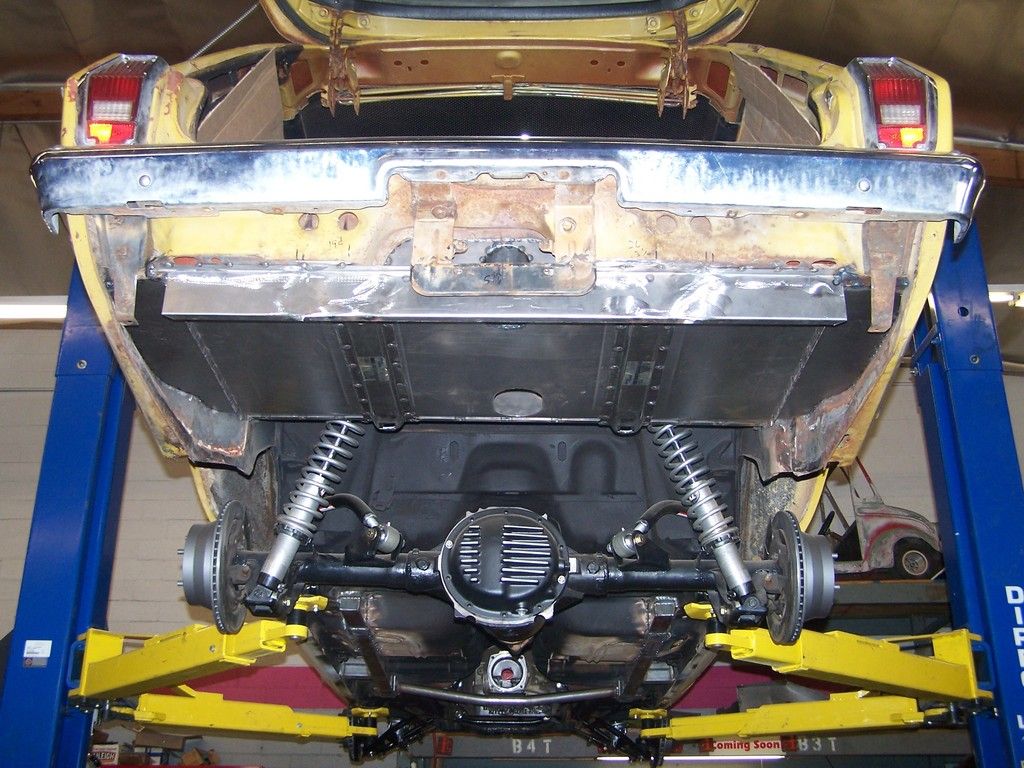
Here's a few pics my mechanic took. He's a better mechanic than photographer though.
under the cargo panel, top of gas tank area:
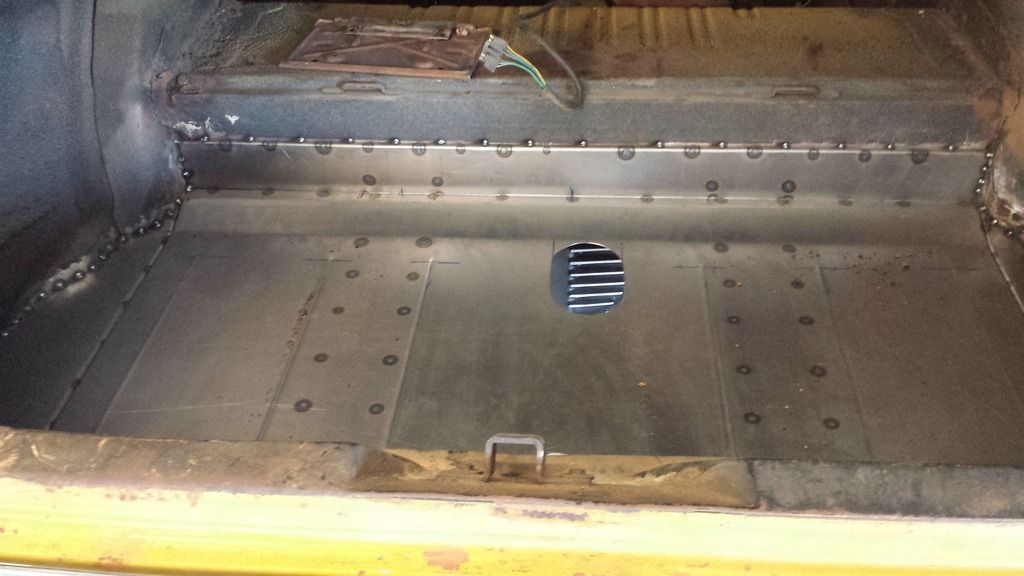
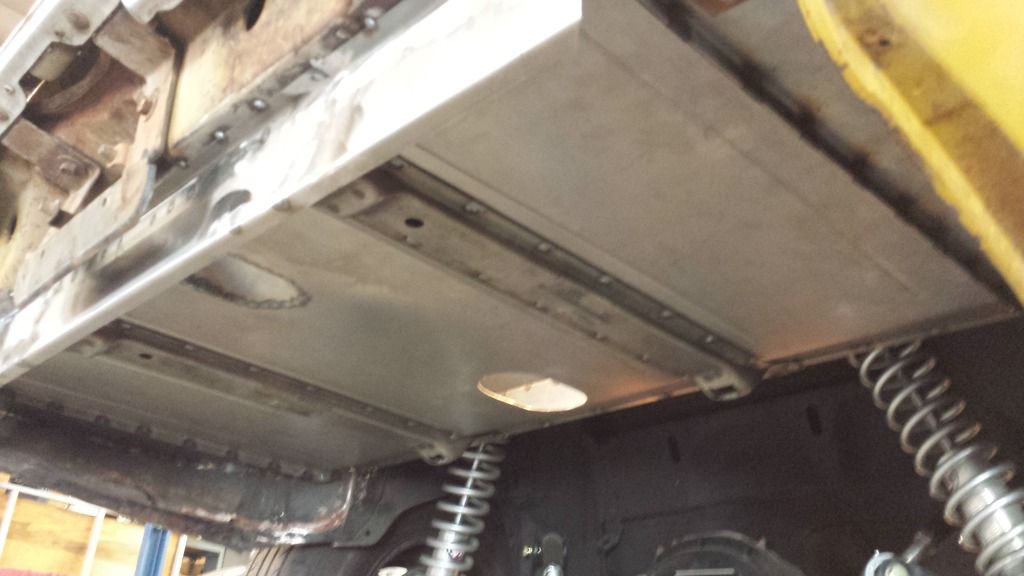
where the gas tank will mount:
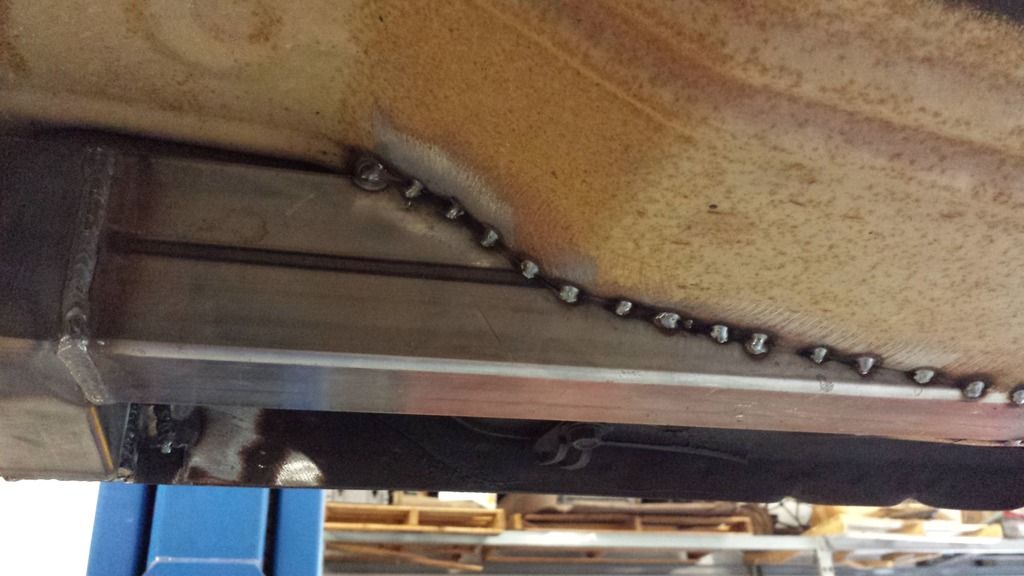
Sub frame connectors:
Still a long ways to go. Thanks to everyone here for their help with parts, and tech ideas.
Bruce
They are putting in the Chris Alston sub frame connectors, the first gen gas tank conversion, and reworking the engine and trans mounts to work.
Here's a few pics my mechanic took. He's a better mechanic than photographer though.
under the cargo panel, top of gas tank area:

where the gas tank will mount:

Sub frame connectors:

Still a long ways to go. Thanks to everyone here for their help with parts, and tech ideas.
Bruce
- b_pappy
- Posts: 193
- Joined: Mon Nov 17, 2014 9:30 pm
Re: '72 Vega wagon, the hard way
![]() by zzip » Sat Jun 06, 2015 3:31 am
by zzip » Sat Jun 06, 2015 3:31 am
Nice work already b_pappy .
Succes and many pics !
Peter from Antwerp
Succes and many pics !
Peter from Antwerp
1988 Monza L4 2.5L
1989 Monza Spyder L4 2.5L
1990 Monza Spyder V6 3.2L
1991 Monza Spyder V6 3.8L
2013 Monza V6 3.8L
2014 Starfire V6 3.8L
1989 Monza Spyder L4 2.5L
1990 Monza Spyder V6 3.2L
1991 Monza Spyder V6 3.8L
2013 Monza V6 3.8L
2014 Starfire V6 3.8L
-

zzip - Posts: 306
- Joined: Thu Oct 24, 2013 11:52 am
- Location: Belgium
1980 Chevrolet Monza 2+2
Re: '72 Vega wagon, the hard way
![]() by b_pappy » Fri Jun 12, 2015 7:09 pm
by b_pappy » Fri Jun 12, 2015 7:09 pm
A little more progress, and hopefully some better pictures. It should be back from the fab shop this week.
Motor and trans mounts are done, sub frame connectors in, gas tank area almost complete. Still need to work rear upper and lower coilover mounts, steering shaft, and a few other small things. It will go back for the headers and exhaust once the new motor is installed.
Motor and trans mounts are done, sub frame connectors in, gas tank area almost complete. Still need to work rear upper and lower coilover mounts, steering shaft, and a few other small things. It will go back for the headers and exhaust once the new motor is installed.


- b_pappy
- Posts: 193
- Joined: Mon Nov 17, 2014 9:30 pm
Re: '72 Vega wagon, the hard way
![]() by b_pappy » Sat Jun 20, 2015 1:30 pm
by b_pappy » Sat Jun 20, 2015 1:30 pm
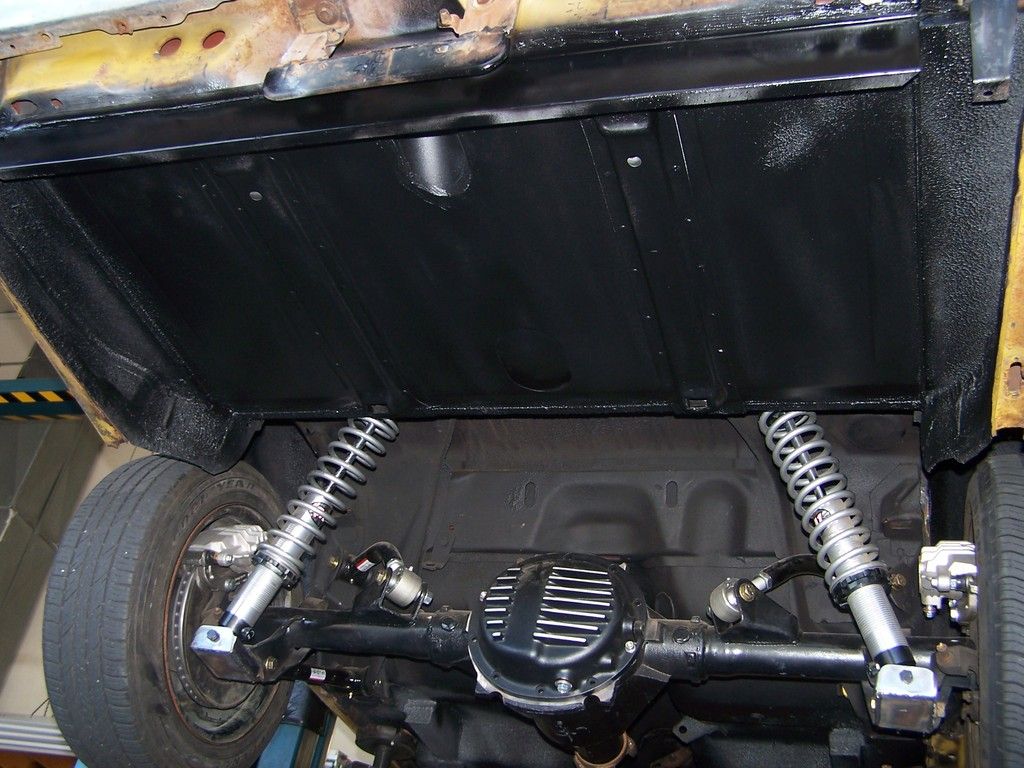
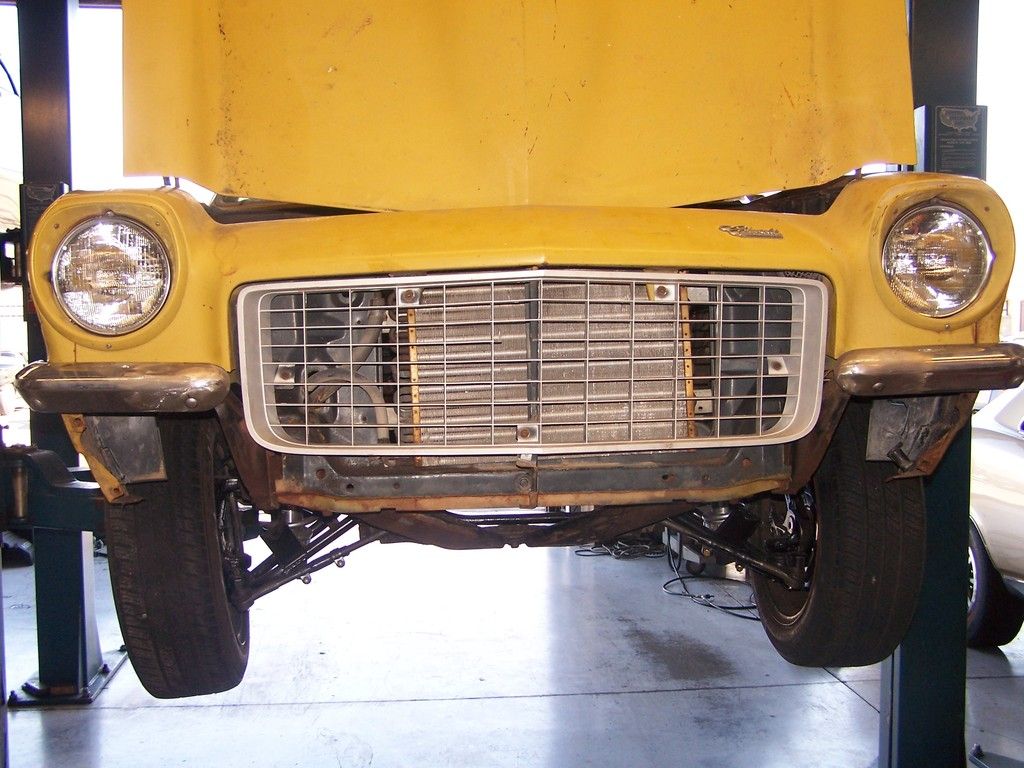
Back from the fab shop. They did a great job modifying the gas tank area, plus fixing the R/S motor mount, was way off. They adapted the manual steering shaft to the power steering box (temp for now, till we fit the headers), reinforced the rear coilover mounts, upper and lower, finished the sub frame connectors and nerfed the front bumper, and lots of other things from my long list. I'm not quite sure how I'll finish the cargo area under the rear deck. thinking Zolotone paint or something.We sent it to the body shop and they sealed all the seams and undercoated it. Since it's a street car that's how I wanted it done under there. I'm happy with the work and progress.
Bruce

The interior seams still need to be sealed, and primed. All exterior seams and metal were sealed, primed with etching primer, painted and undercoated. Shouldn't rust now.
Bruce

The interior seams still need to be sealed, and primed. All exterior seams and metal were sealed, primed with etching primer, painted and undercoated. Shouldn't rust now.


- b_pappy
- Posts: 193
- Joined: Mon Nov 17, 2014 9:30 pm
Re: '72 Vega wagon, the hard way
![]() by b_pappy » Wed Jul 29, 2015 10:07 am
by b_pappy » Wed Jul 29, 2015 10:07 am
Just an update, with no progress to report. Whoever said "building a Vega is cheap" never built a Vega. So my project sits and waits for an infusion of funding. I have my '65 El Camino and a Cadillac XLR for sale. Hopefully something moves soon. The problem is I love both those cars too. Oh well.
Bruce
Bruce
- b_pappy
- Posts: 193
- Joined: Mon Nov 17, 2014 9:30 pm
Re: '72 Vega wagon, the hard way
![]() by b_pappy » Sat Oct 31, 2015 7:46 pm
by b_pappy » Sat Oct 31, 2015 7:46 pm
Well the project is coming a slower than I would like, but still making progress. GM stopped selling their ZZ383 engines. That kind of left me pondering which way to go. Decided on going with a custom built 383; 4 bolt main, Comp roller cam, forged bottom end, Skip White heads. A little more than the crate motor, but a better engine. Also got word the 700R4 trans is done. Hopefully I'll be posting some pictures of these going in the car soon!
Still metric crap tons of work to do though.
Bruce
Still metric crap tons of work to do though.
Bruce
- b_pappy
- Posts: 193
- Joined: Mon Nov 17, 2014 9:30 pm
Re: '72 Vega wagon, the hard way
![]() by TOM71VEGA » Sat Oct 31, 2015 11:25 pm
by TOM71VEGA » Sat Oct 31, 2015 11:25 pm
Looking great
What model number are those front coil overs.
What model number are those front coil overs.
-

TOM71VEGA - Posts: 94
- Joined: Sun Oct 25, 2015 8:08 am
- Location: Chicago
1971 Chevrolet Vega Hatchback
Re: '72 Vega wagon, the hard way
![]() by b_pappy » Sun Nov 01, 2015 7:37 pm
by b_pappy » Sun Nov 01, 2015 7:37 pm
Thanks! I don't have the P/N right in front of me. They are Viking, for 1st gen Camaro, the springs are a 350 lb rate. Personally I think it will too stiff, but it's what they recommended, and I won't worry till we get the drivetrain in. The A arms are AJE Racing.
Bruce
Bruce
- b_pappy
- Posts: 193
- Joined: Mon Nov 17, 2014 9:30 pm
Re: '72 Vega wagon, the hard way
![]() by avewhtboy » Tue Nov 03, 2015 9:25 am
by avewhtboy » Tue Nov 03, 2015 9:25 am
b_pappy wrote:Thanks! I don't have the P/N right in front of me. They are Viking, for 1st gen Camaro, the springs are a 350 lb rate. Personally I think it will too stiff, but it's what they recommended, and I won't worry till we get the drivetrain in. The A arms are AJE Racing.
Bruce
I went with 450lb springs and so far I am pretty happy with the way it feels, so I doubt 350lb will be too stiff.
-

avewhtboy - Posts: 573
- Joined: Thu Sep 24, 2009 11:06 am
- Location: Stone Mountain Georgia
45 posts
• Page 2 of 3 • 1, 2, 3
Who is online
Users browsing this forum: No registered users and 20 guests